Astronomy Software by Any Other Name
In this article, I introduce another option available for the astronomers out there—specifically, Cartes du Ciel, also known as SkyChart. Similar to other larger astronomy programs, you can use SkyChart from the desktop to the observatory.
SkyChart probably won't be available in your distribution's package management system, so you'll need to go to the main website to download it. DEB, RPM and TAR files are available, so you should be able to use it for just about any distribution. Downloads also are available for other operating systems and for other hardware. You even can download a version to run on a Raspberry Pi.
When you first start Cartes du Ciel, you'll be asked where on the globe your observatory is located.
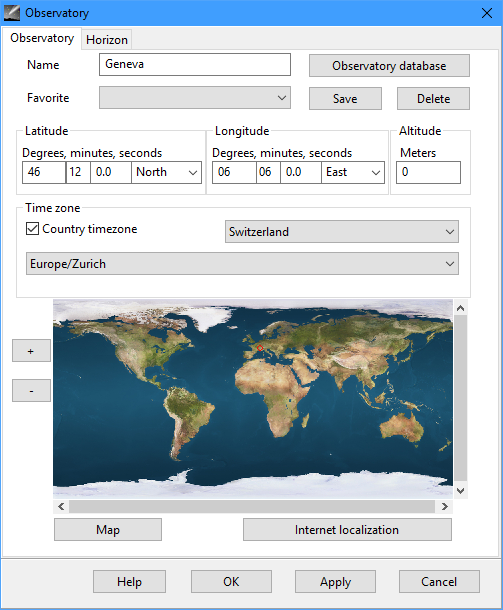
Figure 1. The first step is to set the location where you'll be making observations.
A number of locations already are listed in the database. If your location isn't there, you can enter the latitude and longitude. Once you are done, clicking the OK button pops up a new window with the sky at the current time and location.
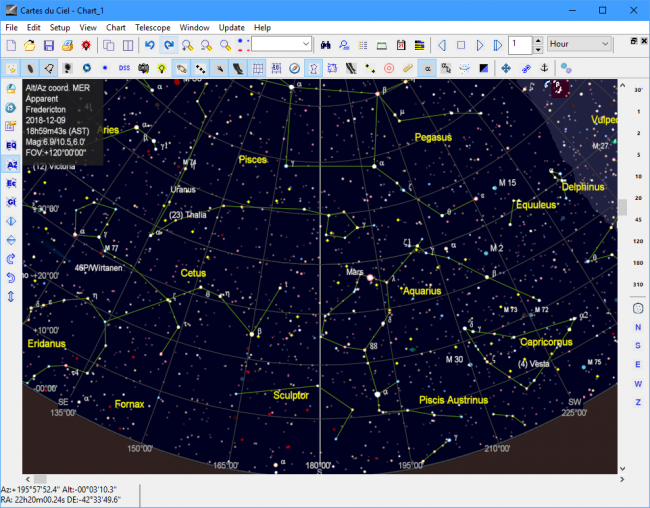
Figure 2. The initial display is the sky over your location at the current time.
Unlike many other astronomy programs, time does not progress automatically. The design is more along the lines of being able to generate viewing charts for observation. Buttons in the toolbar at the top allow you to update the time easily.
The default view is to look at the sky at due south. You can change this view by clicking and dragging the star field. If you want to center it on a cardinal direction, there are buttons along the bottom right-hand side of the screen for that task. Just above these cardinal direction buttons, field of view (FOV) buttons set the amount of the sky that is visible.
Along the left-hand side of the main window are several buttons for turning various coordinate systems and markers on and off. Along the top, several toolbars allow you to select which elements of the sky are visible within the sky chart that you are generating. All of these options also are available as menu items. Clicking the Chart menu item provides a list where you can change parameters, such as the field of view, the viewing direction or the coordinate system to use.
Under the View menu item, several other informational windows are available that you can use to see even more details about what's visible in the sky. For example, when you click the menu item View→Solar System Information, you get a pop-up window showing what major objects are visible and when.
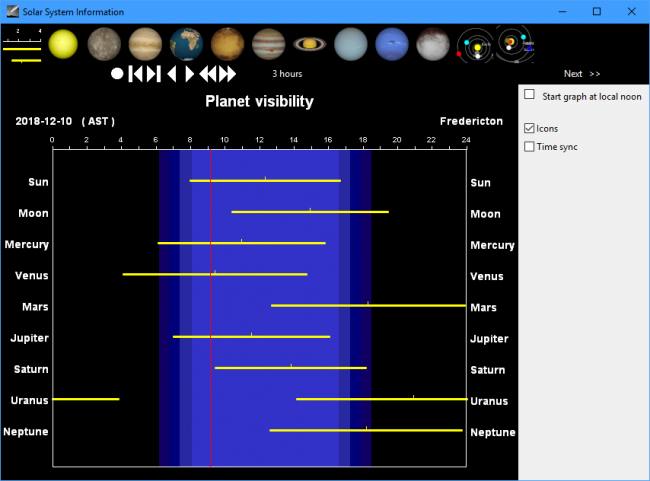
Figure 3. You can find out what each of the planets looks like from your current location for the current time.
Clicking each of the entries at the top of the window will pull up the relevant planet as it would look from your current location at the current time, giving a preview of what you should be able to see from your telescope. Clicking the View→Calendar menu item pops up a window with a table view of several different astronomical events for a given set of dates.
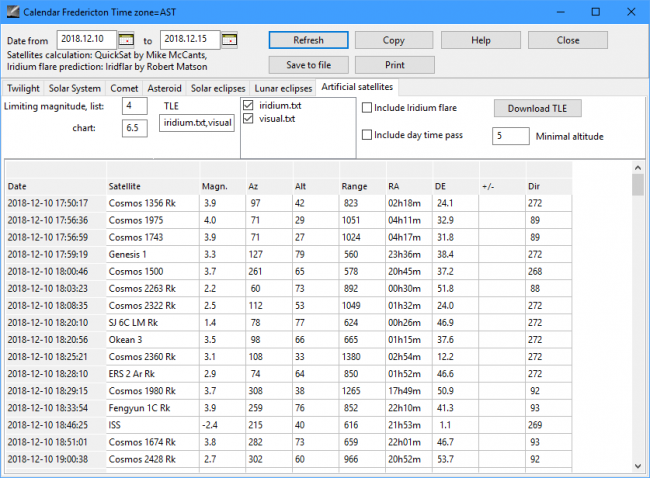
Figure 4. You can get detailed positioning and timing information for objects in the sky that can be used to point your telescope.
For example, you can get a list of the positions of several artificial satellites for the dates listed, or the times for twilight or the positions of comets and asteroids. You can use these types of details for ideas on where to point your telescope.
Speaking of telescopes, you also can connect directly to your telescope if it includes the functionality of being computer-controlled. Clicking the Telescope→Telescope settings menu item pops up a window where you can select from one of several telescope control unit drivers. Once you have selected the correct driver, you can click the Telescope→Connect telescope menu item to get a new window where you can enter the parameters for your particular telescope.
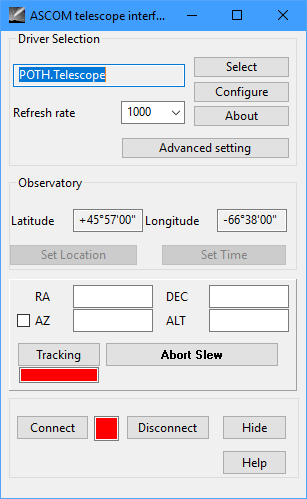
Figure 5. You can connect to a telescope that accepts computer instructions to help coordinate and direct your viewing.
Once that's done, you can get the telescope to slew or even track a given point in space. Along with being able to connect to telescopes, Cartes du Ciel also supports the SAMP (Simple Application Messaging Protocol) intercommunication protocol to talk to other pieces of equipment. The networking design is to have several units connected together through a central hub. Cartes du Ciel does not include software to act as a hub, so you will need some other piece of software to be the hub for your network.
Cartes du Ciel can track several categories of objects in the sky, including lots of smaller natural objects and man-made objects. These lists are being updated constantly, so functionality is included to perform updates of those catalogs. The catalogs are all located under the Update menu item.
On this list, you can update the Artificial satellites, Asteroid elements, Comet elements and the core software. Clicking on any of those menu items opens a window that checks for any updates and automatically downloads and installs them. This way, you always can keep Cartes du Ciel as up to date as possible. But, even the most robust updating system may miss out on objects that are of special interest to you. In those cases, you can add objects to your catalog manually. Clicking the Setup→Catalog menu item pops up a new window where you can edit the details of the data catalogs available to Cartes du Ciel.
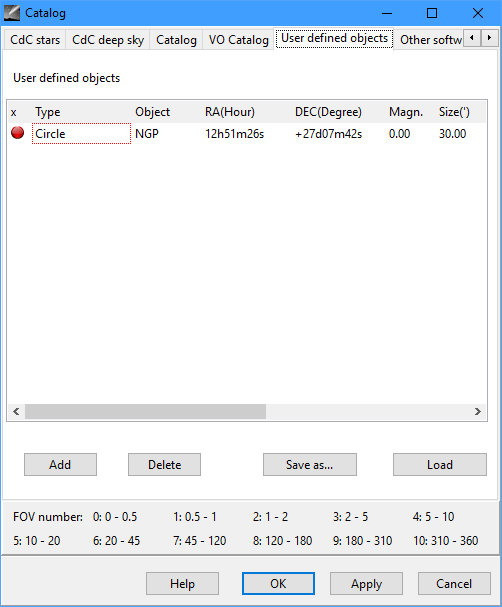
Figure 6. If necessary, you can add objects manually that may be missing from the standard catalogs of celestial objects.
If you select the User defined objects tab, you can enter a list manually of individually defined objects so that you can add them to your sky charts.
Once you have a sky chart ready, you can output the results in a few different ways. You can save the results in a file format specific to Cartes du Ciel. You also can export the result to an image file (PNG, JPEG or BMP).
If you have to travel to get to your telescope and can't bring a computer, you may need more detail than what's available from an image. Clicking the View→Object list menu item pops up a window with the details of all of the objects in the current view of the main window. This includes everything you should need in order to direct your telescope and make appropriate observations.
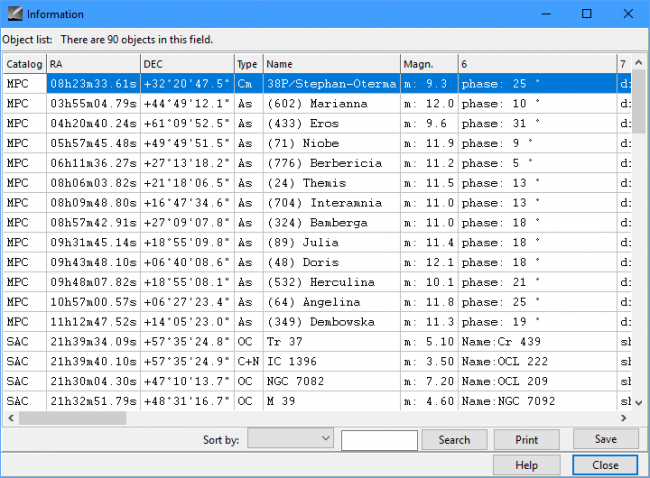
Figure 7. You can print out everything you need to be able to make your observations, even if you won't have access to any kind of computing.
I hope this short article gives you some ideas of how you can get and use the type of data that's available to professional astronomers.


