New Projects - Fresh from the Labs
One of my chief bug bears of Linux systems over the last eight years or so is the high level of dependence on Net connectivity and the constant assumption that you even have a connection in the first place. “I'm trying to compile MPlayer, but there are dependency problems.” “Just install it with apt, it's easy.” “I don't have the Net.” Blank stare. My twin brother, for example, is a loyal Linux user and lives in a flat where it's hard to get a connection, and as a musician, it's very hard for him to stay in Linux to do his work, because the programs he needs have niggling dependencies. These can take a day to resolve when he has to go to an Internet café, grabbing random .deb files and hoping they work.
Well for all you Net-deprived people, I feel your pain, and so does Chris Oliver, with his new program Keryx. Keryx is a free, open-source application for updating Ubuntu. The Keryx Project started as a way for users with dial-up or low-bandwidth Internet to be able to download and update packages on their Debian-based distribution of Linux. Mainly built for Ubuntu, Keryx allows users to select packages to install and check for updates and download those packages onto a USB key. The packages are saved onto the device and then can be taken back to the Linux box to be installed. Because of the design, Keryx can be run on any OS that has Python, GTK and PyGTK installed. For Ubuntu (GNOME) users, everything is pre-installed. Windows users also will have no software to install, because Keryx and everything it depends on will be made to run portably off a USB Flash drive.
Installation
If you've got a standard Ubuntu system, you're set. If you have a variant of some sort, make sure you install all of the standard GTK, Python and PyGTK libraries before continuing. Head to the Web site, grab the latest tarball, extract it somewhere locally and open a terminal in the main keryx directory. And, that's it.
Usage
In the main keryx folder, enter the following command:
$ python keryx.py
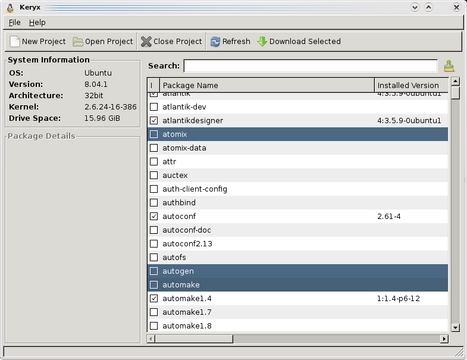
You'll be greeted by the main screen where the first thing you need to do is start a new project with the aptly titled New Project button. Each project is designed to keep track of a different computer's packages, meaning you can take care of multiple machines with the one USB stick. Once you've entered your project name, you'll be prompted to choose between Local Files or Internet. Local Files is meant for those without any connection at all, but at this point, there's no technical difference between either Local Files or Internet. At this stage, Keryx will appear to hang, but it isn't, it's just processing a whole bunch of repository information—things about local files and so on. Give it a minute or two, and it should be back with you.
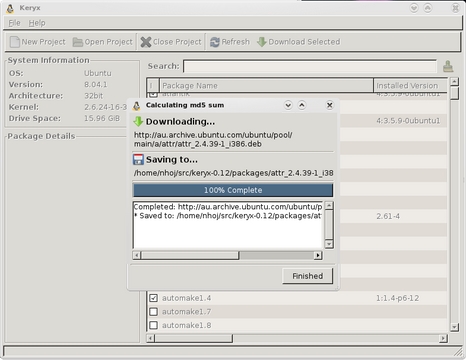
Once Keryx has sprung back to life, you'll be presented with a long list of packages, Synaptic style. For choosing packages to install, the interface is a little quirky. Those tick boxes won't let you choose a package; they just tell you whether it's installed already. To install a package, click on the actual name of the package, and if you want multiple packages, Ctrl-click or Shift-click the same way you would in any modern file manager. When you're ready to download the packages, click Download Selected at the top-right of the screen. Keryx will download everything and save any downloaded packages to the packages folder in the main keryx directory.
From here, you'll have to install these packages yourself manually, either by command line with dpkg or with a package management program under X. It's a bit of pain, I'll admit. However, this project is very young, the interface is still very much in its infancy, and adding the option to install the packages from within Keryx should take only a few GUI shortcuts to some pretty basic commands. It's in its early days, but it does genuinely look promising, with a planned Mac port even in the works once the project becomes more stable. Poor Linux enthusiasts without the Net rejoice. In the near future, your savior may be arriving in the form of Keryx!
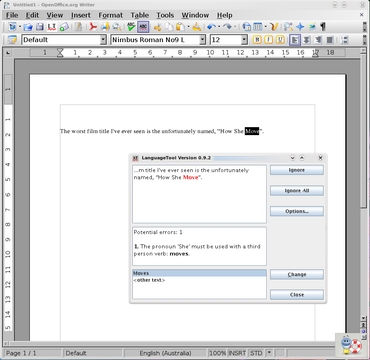
I find that after submitting an article and reading it again a few days later when my brain's fresh, I've made some heinous grammatical error somewhere and not noticed it. And, that's what I've just sent to the editor. Spiffing. Well, it's not like the spell-checker picked it up, is it? I read through it several times, but still, I missed it. Well, Daniel Naber has just the thing for me with the imaginatively titled LanguageTool.
LanguageTool is a grammar-checking plugin for OpenOffice.org based on Java with support for English, Polish, German, French and Dutch, and basic support for some other languages, such as Swedish and Russian. LanguageTool scans words and their part-of-speech tags for occurrences of error patterns that are defined in an XML file, and more powerful error rules can be written in Java and added later.
Installation
Head to the Web site, but before you download the plugin, you need to choose between two versions. One is for the 2.x series; the other is for the newer 3.x beta series. If you'd like a demo before you install it, there's a link on the site to do just that, and it'll run in your browser provided you've got basic Java plugins. Speaking of Java, you need version 5 of Sun's Java, not one of these alternative jobbies. Once you've selected your version, save it to the hard drive and open up your version of OpenOffice.org Writer.
To install the plugin, click Tools→Extension Manager, and once inside the Extension Manager window, click the Add... button and browse for the .oxt file you downloaded earlier. Once you've done this, LanguageTool should be installed. Close OOo and restart it, and it should be good to go. Before we move onto usage though, I can't stress enough how important it is to have the right Java packages installed. If you have Sun Java 5 installed and the following steps aren't working for you, make sure you install all of the other Java packages, like jre and so on.
Usage
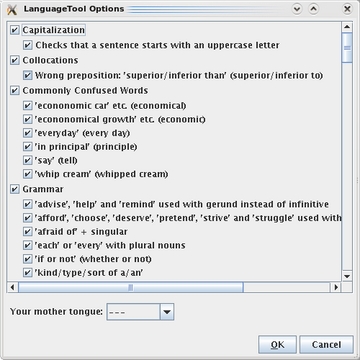
With LanguageTool installed, the first thing you need to do is choose your language. Click Tools→LanguageTool→Configuration, and once inside the configuration screen, choose your default language under the drop-down box titled Your mother tongue:. Notice that big list of language rules? It's pretty impressive, don't you think? For those with OOo 3.x, life is slightly easier. Simply type some text in the main screen, and it should check it automatically (the Web site recommends typing “This is an test.” for some deliberately bad grammar). For those on the 2.x series of OOo, you need to choose Tools→LanguageTool→Check Text each time you want to check some text.
Once installed, I found LanguageTool an intuitive tool with a familiar interface that I now will use in my daily work (much to the joy of our editor I should imagine). Check it out.
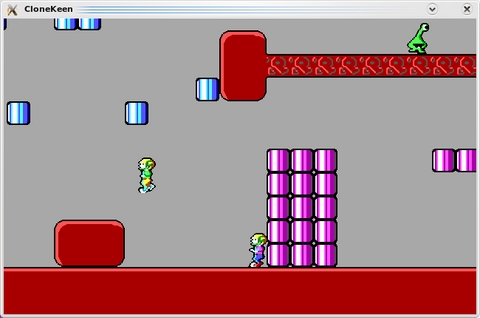
At the very beginning of the 1990s, side-scrolling platformers were the order of the day, and gaming consoles were having unprecedented success with the likes of Mario Bros. and Sonic. So, what about the PC? Enter Commander Keen. Developed by the now-famous id Software, Commander Keen (or just Keen as it was often called) had unrivaled gameplay, level design, smooth scrolling and a solid feel to it that was missing in other games. id soon would go on to develop other ground-breaking titles, such as Wolfenstein 3D, Doom and eventually, Quake, and in the same way that these landmark games were all superior to their rivals, Keen had the gameplay and feel to it that was simply unmatched. Play it now, and it still makes sense. Get six-year-olds to play Keen for five minutes, and you won't have to explain why it's good or say how great it was at the time—they'll just know. And, it's not just nostalgic me that sees it as a classic either; any Steam users can download the series and play it through the DOSBox emulator on their modern PCs. But, that's still really just emulation, and Caitlin Shaw has other ideas with CloneKeen— a restoration of the original three Keen episodes running natively using SDL, making it portable to a large number of platforms including Linux, Windows, the GP2X, the Dreamcast and PSP.
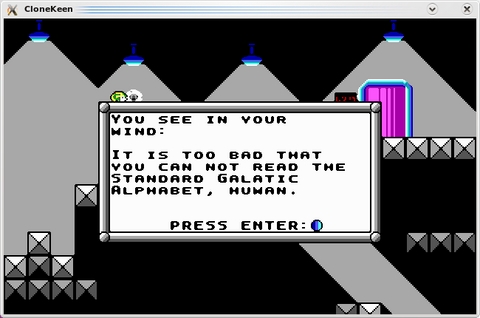
Another deeper gameplay element of Commander Keen: its very own alphabet that is decoded later in the series.
Installation
Unfortunately, CloneKeen still is in a state of flux and needs some cleaning up on the Linux side. I got CloneKeen working and compilation certainly is doable, but any comprehensive instructions would be too long to include here and may well have changed by the time this goes to print, so please check the readme file and the Web site's instructions. That's about all I can say in that regard; however, I can give you a few tips before you embark on a compilation fest. First, you need a copy of the original episodes, and more important, you need to copy these into CloneKeen's data folder. Second, once in the src folder, you need to copy the Makefile.lnx to the Makefile like so:
$ cp Makefile.lnx Makefile
Third, enter make clean before entering make, or you'll run into errors. But finally, Caitlin herself says that she just mostly uses the Windows binary package and copies the compiled Linux keen binary into the folder of the Windows package and runs the keen binary from there (and trust me, for the moment, it's easier). I realise that's not really all that helpful, but hopefully by the time you read this, the installation will be cleaned up.
Usage
If you've been lucky enough to get it working, any key will get you into the main screen. Under Options, you can adjust the screen size so that you don't have a tiny little window, but I recommend full screen for the authentic feel with smooth scrolling. Start a new one-player game, and you can control the character using the arrow keys, with Ctrl for jump, Alt for the pogo stick once you have it, and Ctrl and Alt in combination to fire the raygun. Otherwise, I'll let you figure it out from there (especially the two-player mode, which I haven't had the proper chance to explore).
Overall, this project is still a bit unstable, with screen errors, sound errors and the like, but if you can get it working, it's well worth the effort. This game really is a classic, and ten minutes of playing time should speak for itself. Plus, the addition of the crazy two-player mode as well as new options, such as “Fully Automatic Raygun”, should give the game a breath of fresh air and a new angle of play. Give it a go or even check it out on Steam if you're lazy. In the meantime, I'm going to have a go at the PSP version.
Brewing something fresh, innovative or mind-bending? Send e-mail to knight.john.a@gmail.com.
John Knight is a 24-year-old, drumming- and climbing-obsessed maniac from the world's most isolated city—Perth, Western Australia. He can usually be found either buried in an Audacity screen or thrashing a kick-drum beyond recognition.


