New Projects - Fresh from the Labs
First up this month, we have Droopy, a miniature Web server. Now, if you're like me, and the combination of seeing the words Linux and Web server usually results in a sleep-induced coma, fear not. This actually is more useful for average Internet users. Its sole purpose is to allow other people to upload files to your PC by presenting them with a Web page interface, and its requirements are about as minimalist as I've come across.
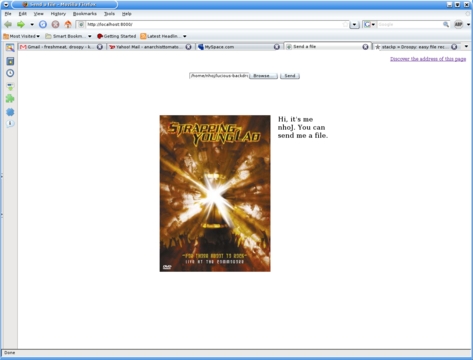
With Droopy, you can lose the limitations of annoying transfer programs with your very own mini-Web server.
Installation
Thankfully, Droopy has only one real requirement—Python. As 99% of you already have that installed, we can jump right into this one. Droopy itself is merely a Python script, so all you need do is head to the project's Web site, and save the droopy file to your local hard disk. You will be running Droopy through the command line, mind you, so save it to a directory that will be easy to access via the command line. The Droopy Web site recommends making the directories ~/bin and ~/uploads, and saving the droopy file to ~/bin.
Once you've done this, it's time to run the script. If you made the uploads directory, open a terminal there before running the script. This isn't a requirement, but wherever you run the script, this is where any uploaded files you receive will go.
Usage
The Droopy site and man page have an example command that inserts a greeting message and displays a picture as well:
$ python ~/bin/droopy -m "Hi, it's me Bob. You can
 ↪send me a file." -p ~/avatar.png
If you have Droopy installed somewhere other than ~/bin, change to path to wherever the droopy file is sitting now. If, like me, you're not called Bob, change the name (you also might want to use a less goofy message). The picture isn't a requirement, but it can help identify your page. It needn't be avatar.png either, any image file will do.
Once the script is running, you can visit a mini-Web site from any browser at https://localhost:8000/.
If all is well, you should have something that resembles the screenshot shown here. This is all well and good, but people need to upload to you. Clicking Discover the address of this page will give you a URL that you can then pass on to your friends, so they now can upload to you, provided the script is running. To upload to one of these pages, there's a rather obvious empty text field with Browse and Send buttons sitting next to it that will allow the people uploading to choose the file they want and send it to you. Once they have sent it, a notification should appear on your terminal output, and the new file will be sitting in your uploads directory.
Not being a security expert, I imagine there's probably some sort of vulnerability here (this most likely would be catastrophic on Windows), but I couldn't give any real advice in that regard. Personally, I don't have a mission-critical enterprise system, so I'm not exactly worried myself, but dig around if you're concerned. All in all, Droopy is a clever piece of scripting that is easy to install and fairly easy to use, provided that you're not scared of the command line. For those put off by transfer methods, such as IRC, MSN clones and the like (and not forgetting pesky e-mail size limits), this may be just what you're chasing.
With the advent of sudo and an increasing number of new Linux users, the possibility of users deleting mission-critical files by accident is becoming all the more real. To deal with this issue there is now safe-rm:
safe-rm is intended to prevent the accidental deletion of important files by replacing /bin/rm with a wrapper that checks the given arguments against a configurable blacklist of files and directories that should never be removed. Users who attempt to delete one of these protected files or directories will not be able to do so and will be shown a warning message instead. Protected paths can be set both at the site and user levels.
Installation
Installing safe-rm is a pretty rudimentary affair. You basically just copy one file to the right place. To begin, head to the Web site and grab the latest tarball. Extract it, and as root, copy the safe-rm file to /usr/local/bin, and rename it to rm.
Make sure the file is flagged as readable and executable for the rest of the system (as root or sudo):
# chmod a+rx rm
If this doesn't work, you may want to make a backup of the original rm in /usr/bin and then copy and rename safe-rm here. This will make your system use safe-rm in place of rm. Of course, you could leave the filename as is and enter safe-rm every time you want to delete a file, but who wants to do that?
As for usage, just use rm the same way you always have, but with the warm and fuzzy knowledge that you're not going to kill your system or accidentally cause nuclear war. Overall, safe-rm is a useful and clever modification on an age-old tool that hopefully will make its way into mainstream distros soon.
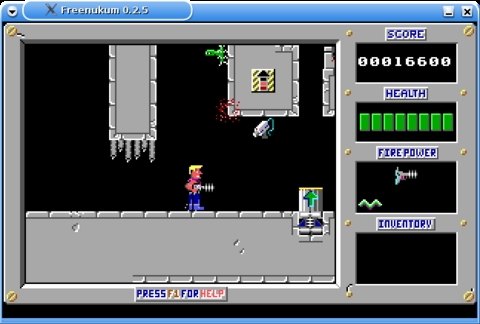
Ah, now for a bit of nostalgia. If your idea of vintage gaming is a Nintendo 64, you probably won't have a clue what I'm talking about. But, for those who are from the era of at least the 286, you no doubt will remember such classics as Commander Keen, Jetpack and, of course, Duke Nukum. If you're thinking Duke Nukum 3D, then think again. That was a remake of this! This was back in the days of the 2-D platformer, and when Commander Keen was king, this came along as a sort of Team America version—rude, crude and supposedly violent (but very tame by today's standards).
With these old classics fading into obscurity and requiring a lengthy explanation from wizened geeks like myself, enter Freenukum, a restorative Linux version on which to waste more office hours. An authentic reconstruction, Freenukum makes use of (and requires for the moment) the original level files to bring back the same feel of this classic platformer.
Installation
The actual program installation is a very straightforward affair, with various binaries available or source code. The source is quite minimal, requiring only the usual:
$ ./configure
$ make
And, as root or sudo:
# make install
Compilation took only a few seconds on my system, and the configure script didn't give me any complaints.
With the compilation out of the way, you still have one more step before you can run the game. Freenukum currently requires the original level files to run, so you need to get a copy of the original from somewhere. Either the shareware version or the full version will work, so Google around and find a host that suits you. Of course, there are abandonware sites, but we aren't encouraging that sort of thing.
Once you have downloaded the original, copy the game's files into the directory ~/.freenukum/data (if you're a bit stuck here and using a graphical file manager, turn on Show Hidden Files). If it's not there, simply create the directories, and everything should be tickety-boo. If you're pedantic about keeping a tight system, a lot of those files aren't needed, but this game was made back in the day of the 286, so the game isn't exactly big. I just copied the whole game.
Usage
Once all that's out of the way, to run it, enter the following command:
$ freenukum
Once you're in the main menu, press the S key to start a new game. Left and right arrow keys control your directional movement, and the up arrow key is used to activate things such as platforms, switches and so on. The left Ctrl key is for jumping; the left Alt key is for shooting, and that's pretty much it—things were simple back in those days! Check the man page for further info on which items do what and further info on the game itself (type man freenukum at the console).
At its current state, some things aren't implemented in the menu yet, such as instructions or the high-score table, so you'll definitely need that man page. Even so, Freenukum still is in a pretty solid state, and it's very playable. Project author Wolfgang Silbermayr made me promise I'd mention that he's looking for some graphic and level designers to help make some original level files to include with the game by default. Once this happens, it'd be great to see Freenukum included in distro repositories.
A shareware download is available at www.3drealms.com/duke1/index.html.
Projects at a Glance
I'm going on a petrol head stint this month and have picked up three cool looking projects for you fellow gas guzzlers.
MegaTunix (megatunix.sourceforge.net)
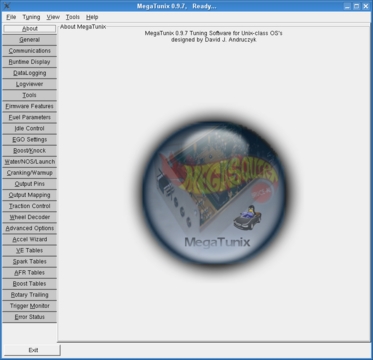
For any ECU tweakers out there with Subaru-colored pajamas, Japanese Drift videos and a Colin McRae embroidered duvet, this is the program for you. Mega Tunix is “...the only tuning software for UNIX- (and now Win32-) class operating systems that supports all existing megasquirt firmwares”. MegaSquirt is apparently “an open-source EFI controller for internal combustion engines, comprised of embedded software, tuning software and various build and deployment tools”. For those readers who are still following me, the MegaTunix developers claim to have the most complete and accurate ECU interrogation of any project out there. The latest versions have been redesigned to be extensible further to support new firmware variants, and the GUI is broken down into lovely little tabs. Neat.
Vamos (vamos.sourceforge.net)
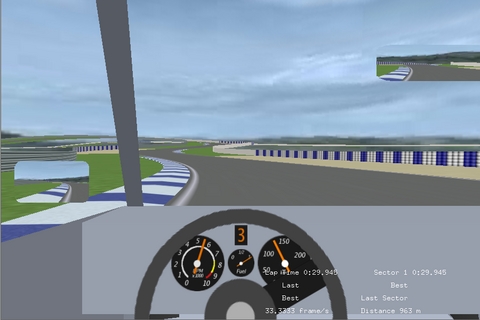
Vamos is a very young project concentrating on being “an automotive simulation framework with an emphasis on thorough physical modeling and good C++ design. Vamos includes a real-time, first-person, 3-D driving application”. It also includes a number of cool real-world locations, with tracks such as Germany's Nurburgring and Japan's Suzuka Circuit, among others. However, this won't be a major draw card of authenticity just yet, as the graphics are still at a level comparable to a 286, and the cars resemble something more like what Postman Pat would drive. As a result, the project's author is inviting anyone to contribute to the effort. Still, it looks promising, especially as parts of its code are being borrowed from another project.
VDrift (vdrift.net)
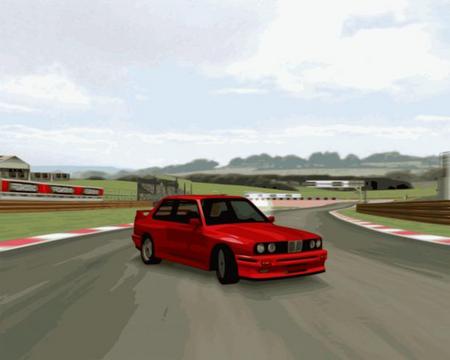
Powered by the just-mentioned Vamos engine, “VDrift is a cross-platform, open-source driving simulation made with drift racing in mind”, and it's currently available for Linux, FreeBSD, Mac OS X and Windows (Cygwin). Although the game is in an early development stage, it is supposed to be very playable and quite feature-packed, with 19 tracks (including the Nordschleife track), 28 cars, AI players, “very realistic physics” and a (simple) multiplayer network mode. Initial screenshots look a little rudimentary at times, but seriously sweet at others. I look forward to playing this one and hope to have an in-depth view of both Vamos and VDrift over the coming months.
Brewing something fresh, innovative or mind-bending? E-mail me at knight.john.a@gmail.com.
John Knight is a 24-year-old, drumming- and climbing-obsessed maniac from the world's most isolated city—Perth, Western Australia. He can usually be found either buried in an Audacity screen or thrashing a kick-drum beyond recognition.


