What's Happening above Your Head?
In the past, I've covered various astronomy packages that help you explore the universe of deep space. But, space starts a lot closer to home. It actually begins a few hundred miles above your head. There are lots of things in orbit right above you. In this article, I look at one of the tools available to help you track the satellites that are whizzing around the Earth: Gpredict.
A package should be available in most Linux distributions. In Debian-based ones, you can install Gpredict with:
sudo apt-get install gpredict
This is usually a version or two behind the latest, so if you want to have the newest options, you always can download and build from source.
Once you
have it installed, you can start it with the
gpredict command. When it
opens, you should see the main window, with a sample layout given by
the module named "Amateur" (Figure 1).
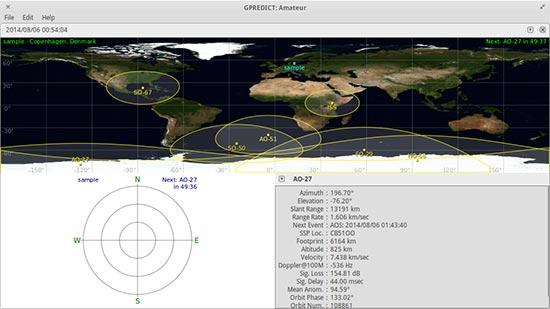
Figure 1. When Gpredict first starts, you get an initial module called Amateur.
In the rest of this article, I take a look at all the various possible layouts and show just how much information is available to you.
The core concept in Gpredict is that of the module. You can think of modules as documents in a word processor. They are containers you can use to hold a number of other layout objects that display satellite information in a number of different ways.
When you first start Gpredict, you get the default Amateur module, which contains a map view, a polar view and a single satellite view. For some of these views, you may notice a small down-arrow in one of the top corners. Clicking this icon gives you an appropriate drop-down list of options. For example, clicking the down-arrow in the map view gives you a list of items, such as detaching the module or configuring it (Figure 2).
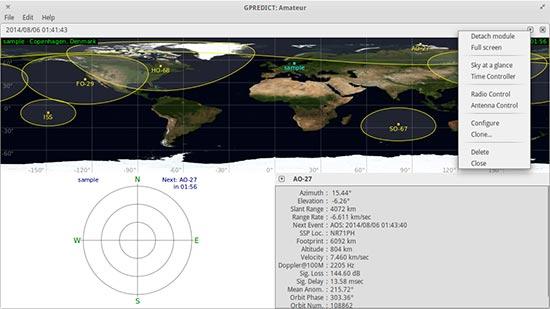
Figure 2. Some views have drop-down lists of options.
The map view offers a map of the Earth, with a series of satellites and their footprints on the Earth. When you hover over one of the satellites, you will see an information box with the satellite's detailed location. The single satellite view provides even more detail about one specific satellite. You can select which satellite is being displayed by clicking on the down-arrow in the view. The polar view provides an overhead look, located at the ground station.
In the Amateur module, you get one ground station called "sample". You can add more ground stations by clicking the down-arrow and selecting configuration (Figure 3).
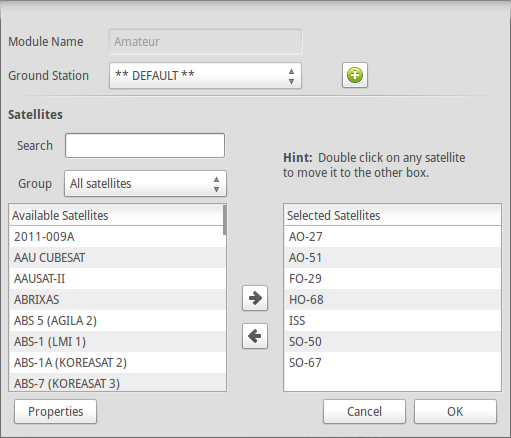
Figure 3. You can set the configuration details for the map view here.
You can add another ground station by clicking the plus sign. This will pop up a details window where you can enter a name and the location data for your ground station (Figure 4). For the location, you can enter the latitude and longitude manually, or if you live in a major city, you can select it from a global list of locations.
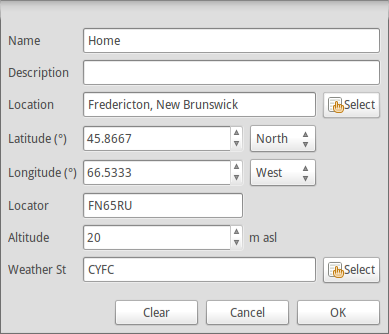
Figure 4. You can add a ground station with details here.
One other item you will notice when you have the configuration window open is that you can select which satellites are displayed. This list is rather large, but there is nothing stopping you from adding all of them to your module. It might make the display a tad crowded, but it still should work.
I should take a step back at this point and describe some other configuration options available. The first option to look at is the menu item Edit→Update TLE. This option lets you update the Keplerian elements for the satellites. You can update them either from the network or from a local file. The default configuration is set up to remind you when the TLE data is likely out of date. You then can go ahead and update this data. For an update over the network, the default configuration is to download NORAD data from https://www.celestrak.com. For a tutorial on the format for TLE data, visit https://www.amsat.org/amsat-new/tools/keps_tutorial.php.
All the other configuration options are available under the menu item Edit→Preferences (Figure 5). Here, you can change options like the number formats used or the geographical coordinates. There also is a tab for ground stations, where you can edit or add ground stations.
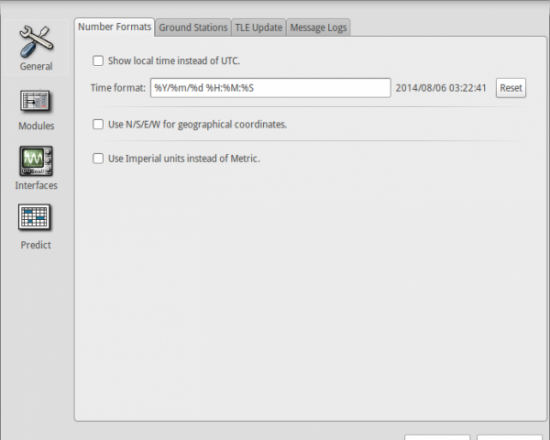
Figure 5. The preferences window lets you change all sorts of options.
The modules section lets you change configuration options used in the display of the Gpredict modules. You can change things like the refresh rate for the displays or what map to use as the background for the map view. You also can select what type of layout you want for a particular module. When you select a new layout, you will see a preview of what it will look like in the preferences window. There are nine different pre-generated layouts available, or you can create a custom layout. When you select the custom layout, you define what it will look like by entering the layout code. See the user manual for details on how to define a code to create the layout you want.
Gpredict also has the ability to control radios and rotators. The key to this is the hamlib library. By using this library, Gpredict can handle Doppler tuning of radios and tracking of antenna rotators. When you want to connect hardware to your computer, you should verify that hamlib can talk to it successfully. Once you have made sure everything is working correctly, you can set up Gpredict to talk to your hardware. This is handled in the interfaces section of the preferences window. There are two tabs, one for radios and one for rotators. Since hamlib communicates over network protocols, the radio or rotator doesn't even need to be connected to the same machine. You can define one of these pieces of hardware with a hostname, a port and the communication details. Once you have the hardware configured, you can control it by pulling up the radio control window, which you access by clicking the down-arrow in the map view and selecting Radio Control (Figure 6). You can see the details of the downlink and uplink, as well as information about targets.
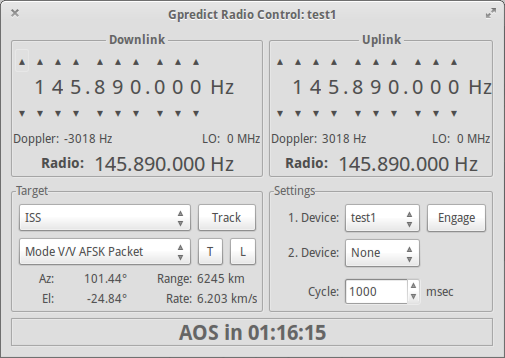
Figure 6. You can control radios and antenna rotators that are defined in Gpredict.
Now that you know how to get satellite information for what is moving above your head, you should be able to go outside and do some actual observations and see all of the man-made objects travelling around. It can be inspiring to see how much we already do in space, and how much more we could be doing.


