Stepping into Science

In past articles, I've looked at several libraries or specialist applications that can be used to model some physical process or another. Sometimes though you want to be able to model several different processes at the same time and in an interactive mode. This is especially helpful in educational situations where you are trying to learn how those processes work. So in this article, I introduce an application named Step from the Edu section of the KDE Project.
The one major limitation is that the simulation runs only in two dimensions. Aside from that, you can model almost any system you can imagine. You can create discrete systems that are made of particles connected either with rigid rods or springs. You can apply external gravitational or electrical forces to your system. There is a molecular dynamics portion that allows you to model gases and liquids, including condensation and evaporation, and there is support for units and error values in your numbers. Several solvers are available to handle the actual calculations, so you should be able to find one that is best for your particular application.
To install Step, you should have a package available within your distribution's package management system. For example, with Debian-based distributions, you can install Step with this command:
sudo apt-get install step
One thing to be aware of is that Step is part of the KDE Project. So, if you install it on a different desktop environment, such as GNOME or Unity, you also will need to install a large number of KDE support libraries. It will run fine on other desktop environments, so you don't actually need to run KDE.
To start Step, you either can find it within your desktop's menu system
or open a terminal window and run the step command. When
it starts up, you'll get a new, empty project in which to build your
simulation.

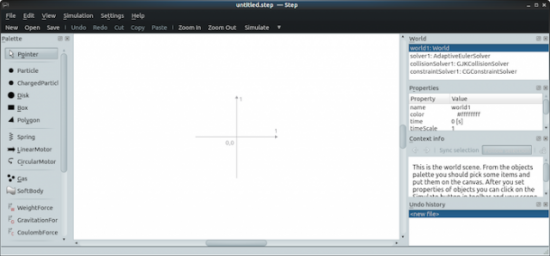
Figure 1. When you start Step, you get a new blank project to start your simulation.
In the center of your window is the main pane where your system of particles and forces is displayed. On the left-hand side is a palette of elements you can use to build the system you want to model. On the right-hand side, you can see a series of panes that give information about the system as a whole, along with details about specific selected elements.
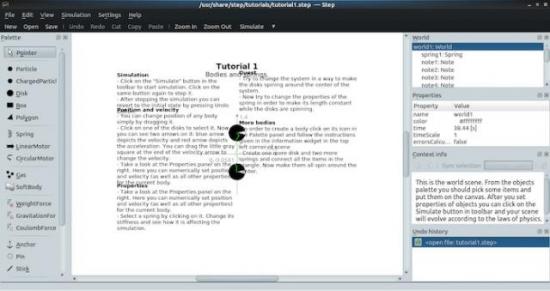
It might be rather daunting to look at all of this functionality and have to start with a completely blank canvas. Luckily, Step comes with a number of tutorials to walk you through the first steps of building and simulating systems within Step. You can access them by clicking the menu item File→Open Tutorial. This pops up a dialog window where you can select and load one of the five provided tutorials. When you select one, you get a system of elements along with a description of activities that you can follow along with to help you learn a bit more about each of Step's sections.

Figure 2. Step comes with a set of tutorials to walk you through some of the available functionality.
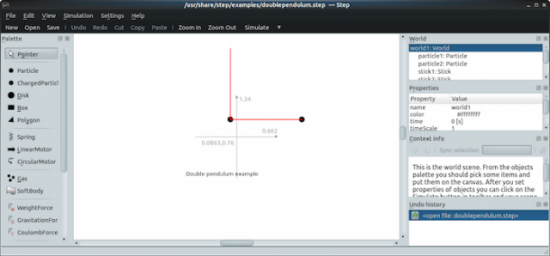
When you want to move on to developing your own models, several example projects are available that cover a large number of physical systems. You can access them from the File→Examples→Open Example menu item. This will pop open a dialog where you can select and load systems, such as the double pendulum model.

Figure 3. Step comes with a number of example projects, such as the double pendulum.
These examples provide a starting point that you can alter to create your own model. In order to make changes, you either can select the element in question within the main pane or you can select from the top pane on the right-hand side. Either of these steps will populate the middle pane on the right-hand side with the details for that element. Then you can go ahead and make your alterations. For example, for a particle, you can change the position, velocity or mass. Once you have your own system built, you can save it as a Step file by clicking File→Save As.
All I've described to this point is setting up the model of the physical system. I've yet to cover any simulating of the physical processes. To start the simulation, click on the Simulate button at the top of the window (just below the menu bar). You should notice a button next to that (with a down arrow on it) that lets you set the speed of the simulation. This lets you see your system in motion, which can be very illuminating in trying to understand how your system will behave.
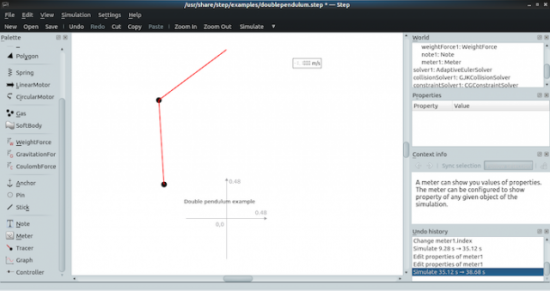
Sometimes, however, this isn't good enough. You may need to have numbers tracking what various elements are doing within the simulation. Luckily, Step provides three measurement objects: meters, graphs and tracers. As an example, let's add a meter to monitor the speed of the first particle in the double pendulum example.

Figure 4. You can add elements, like meters, to track the behavior of elements in your simulation.
Start by clicking the meter option in the object palette. Step then asks you to select where this meter will be displayed. Once it's created, you still need to configure it so that it's monitoring a certain property of some object. You either can right-click on the meter and select Configure meter, or you can select the meter object from the top pane on the right-hand side.
In the example given in the screenshot, I chose the velocity of the particle1 object. When you first do this, you may notice that the meter isn't actually displaying anything. Don't forget that you also need to select the index of the property. In this case, you would need to change it from the default of 0 to 1.
Once you start creating your own systems, you may decide that the default solver isn't appropriate. Each solver is better or worse, depending on the details and constraints for your system. The details of the numerical analysis involved are too much to cover for such a short article, but you should know that you do have some control over this. You can select the solver1 object from the top pane on the right-hand side. The middle properties pane lets you select the solver type from among the 16 available solvers. You should be able to select one, along with its other properties, that is appropriate for your simulation.
I've covered only the most basic elements available within Step here, but hopefully you've seen enough to spark your interest in playing with it further—especially if you need a good tool to teach these types of physical processes to your students. They'll get a much more intuitive feel for them when they can play with the relevant parameters and see what effects they have.


