Linux on a Fingernail

This issue of Linux Journal is all about how to get Linux in your pocket. In this article, I go one better and tell you how to get Linux on your fingernail. Now, before you get too excited, I won't be discussing some new nano-computer being used by James Bond, unfortunately. Instead, I discuss how to put Linux on a micro-SD card (or any other USB drive, for that matter). Using this, you can run Linux on any machine that can boot off a USB device.
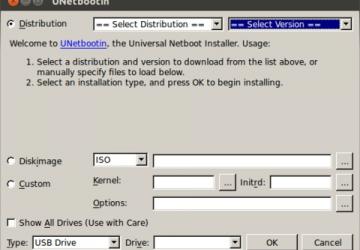
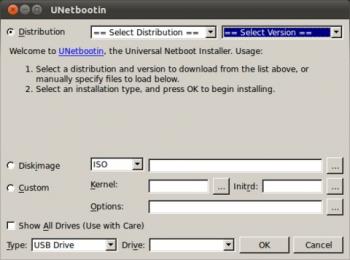
One of the first utilities to receive widespread attention and use is UNetbootin (https://unetbootin.sourceforge.net). This application is available under both Linux and Windows. It has built-in support for downloading and installing several Linux distributions, including Ubuntu, Fedora, Debian, PCLinuxOS, Linux Mint, Sabayon Linux, openSUSE, Gentoo, Arch Linux, MEPIS and many others.

Figure 1. UNetbootin
UNetbootin also has the ability to load several different system utilities, such as the following:
- Parted Magic: a partition manager that can resize, repair, back up and restore partitions.
- SystemRescueCD: a system repair, backup and recovery tool.
- Super Grub Disk: a boot utility to restore and repair GRUB installations.
- Backtrack: a utility for network analysis and penetration testing.
- Ophcrack: a utility to recover Windows passwords.
- Smart Boot Manager: boots off of CD-ROM and floppy drives on machines with a faulty BIOS.
- FreeDOS: an open-source DOS to allow you to run BIOS flash utilities or just plain-old DOS.
UNetbootin can download the correct ISO image for all of these distributions automatically, or you can download (or create) your own ISO image and hand the filename to UNetbootin. In either case, the next step is to extract all of the files from the image so they can be copied to the USB drive. The USB drive you want to use needs to be formatted with a filesystem already on it. Once the files all have been extracted, UNetbootin uses some heuristics to figure out where the kernel and initrd files are hiding and places them into /ubnkern and /ubninit. It then goes through the boot configuration files from the ISO to try to figure out what boot options need to be set on the USB drive. Once it figures that out, it puts those options into the configuration file /syslinux.cfg. Then, UNetbootin uses Syslinux to make the USB drive bootable, and you should be good to go.
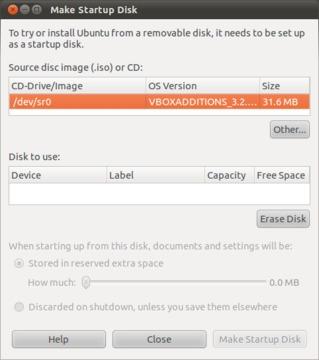
Another utility that has started garnering a lot of attention is usb-creator (https://launchpad.net/usb-creator). This program is the official tool to create live USB versions of Ubuntu live CDs. This utility started with version 8.04 of Ubuntu. A KDE front end showed up in version 8.10, and a Windows version currently is in the works. This utility can do the same sort of work as UNetbootin. It has the built-in ability to create an Ubuntu live USB, but that's not all. Like UNetbootin, usb-creator can take an arbitrary ISO image and copy that onto your USB drive. It even can take a CD-ROM from your CD drive and copy its contents over to your USB drive. It's a simple matter of selecting the source and the destination, and then running.

Figure 2. usb-creator
One big advantage of usb-creator is its ability to create a persistent live USB for you very easily. Any extra space on your USB drive, above and beyond what is required for the OS files, can be used as writable space for persistent files. This means any changes you make to your system will be written to the USB drive. You even have the option of clearing the persistent space on shutdown. That way, you can use your USB drive as a complete operating system, exactly as if it were on your hard drive. And, there you go, Linux on a thumbnail.
All of these techniques require you to have either a live CD or an ISO
image of a live CD. But what if you want to go a bit more low-level, a bit
more from scratch? One of the tools available to you is Syslinux (
- syslinux: booting from FAT filesystems.
- pxelinux: network booting.
- isolinux: bootable "El Torito" CD-ROMs.
- extlinux: booting from ext2/ext3/ext4 or btrfs filesystems.
- memdisk: a tool to boot legacy OSes from nontraditional media.
Syslinux installs into the boot sector of your device and puts a copy of the file LDLINUX.SYS into the root directory. It then loads the kernel and other OS files from the actual filesystem. Because the filesystem is just a simple FAT filesystem, all the files, including the kernel, can be manipulated using standard DOS tools. By default, Syslinux assumes the kernel is in the file named LINUX on the boot disk. This default can be changed in the config file. If you hold down the Shift or Alt keys during bootup, Syslinux displays a LILO-style "boot:" prompt where you can enter a kernel filename and options.
Syslinux searches for its configuration file in the following order: /boot/syslinux/syslinux.cfg, /syslinux/syslinux.cfg, /syslinux.cfg.
In this file, you can set parameters to change all the default settings. Any filenames in the configuration file are relative to the directory that syslinux.cfg is in, unless it is a full path. A basic example looks like this:
DEFAULT linux
LABEL linux
  SAY Now booting the kernel from SYSLINUX...
  KERNEL vmlinuz.img
  APPEND ro root=/dev/sda1 initrd=initrd.img
The kernel types that Syslinux supports don't need to be a regular Linux kernel image. They can be a PXE bootstrap program, a boot sector or a COMBOOT image.
These techniques and utilities should give you a good start at putting your USB drives to their best use. You now can carry around your whole OS in your pocket. This is essentially what I've done for my old Eee PC. With Linux on USB, I can keep the same system there, and on my MacBook through Parallels. You also can use the same system on basically any machine that you can get to boot off of USB. Have fun and be creative.


