Adding Master Pages to Scribus
9b71.png?itok=K7gCkbpb)
Like most word processors and layout applications, Scribus has a variety of tools that allow you to design once and use repeatedly. For pages, the tool is Master Pages. Master Pages are styles or templates in which you can position repeated elements like headers and footers or logos. Their initial creation can take time, but, once you have made them, Master Pages can be stored and applied with a few clicks.
If you have used Master Pages in other applications, then you should have few difficulties using them in Scribus. However, you should know that Scribus Master Pages function differently from similarly named concepts in other applications.
For one thing, the contents of any frames on Master Pages are editable only on the Master Page itself. Instead, objects on Master Pages are always on the bottom of any stack of objects on a document page. Nor can you create an empty frame on a Master Page that produces a separate editable frame on each page to which it is applied, the way you can in OpenOffice.org or LibreOffice.
In addition, Scribus in general makes less use of dynamic fields or building blocks to help with layout. You can set page markers that will automatically update according to the page they are on (see below), but that's about it. You cannot, for example, create running headers that automatically insert the text of the nearest Heading1 paragraph style into a footer or header. Instead, you have to create separate Master Pages for each section of a document that vary only in the content of the footer or header.
These limitations make Scribus Master Pages less useful than some of their equivalents in similar applications. However, Master Pages are still worth learning, because they remain a way to reduce your workload.
Editing Master Pages
You have two ways to create a Master Page: from an existing page layout, and from scratch.
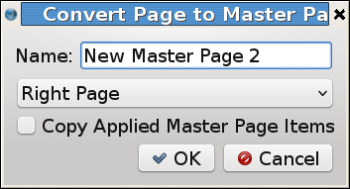
The easiest way to create a Master Page is to select Page -> Convert to Master Page from the menu. This selection opens the Convert Page to Master Page dialog window, from which you can name the new Master Page (checking the combo box to make sure you don't duplicate names, and, if you choose, to copy any objects from the Master Page that the current page uses. Should you not select this second option, than only objects on the current page become part of the new Master Page.
To create a Master Page or edit an existing one, select Edit -> Master Pages to open the Edit Master Pages dialog window. While this dialog is open, any changes you make are to a Master Page.
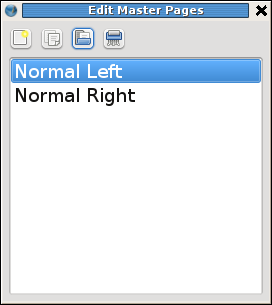
The Edit Master Pages dialog has four buttons across the top. Click the first button on the left, and a blank new Master Page opens for you to work on, starting with a second dialog for naming it. Click the second button, and the new Master Page opens with all the objects of the existing Master Page that you select -- a choice that saves you time when, for example, you want the left and right pages of a document to be mirror images of each other, identical in content, but different in the positioning of each piece of content.
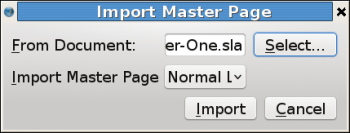
With the third button, you can import Master Pages from another Scribus document, saving you the problem of carefully recreating them. With the fourth, you can delete the Master Pages you select from the pull-down list in the dialog.
The actual editing of Master Pages is no different from editing a normal page in your document. By selecting Manage Page Properties from the bottom of the right-click menu, you open a dialog from which you can set such layout options as the page size and orientation and the margins. Margins are defined as Inner and Outer rather than Left and Right because what matters is not so much the position of a page but the space along the inside of a bound book, which may require extra space for the glued or sown boundary. Typography experts can also choose preset-layouts, classic proportions for a page such as the Golden Mean in order to set the margins automatically.
If you want to create a header, you begin by creating a text frame. Once the frame is positioned to your liking, right-click the frame and select Edit Text to open the Story Editor. Add what text you want in the header, such as the chapter title or your name, using the Insert -> Character sub-menu to add a page number or the number of pages field. Align the text as you want, then select File -> Update Text Frame and Exit to import the contents of the Story Editor to the Master Page's text frame.
To further edit the header, select Properties from the right-click menu. When you are finished editing, close the Edit Master Pages Dialog, and you return automatically to the document page that you were last working on.
In the case of page numbers, you can edit further by changing the numbering style according to section in File -> Document Setup -> Sections. This feature is useful when, for example, you have an introduction numbered in lower case Roman numerals and the rest of the document in Arabic numerals.
Applying Master Pages
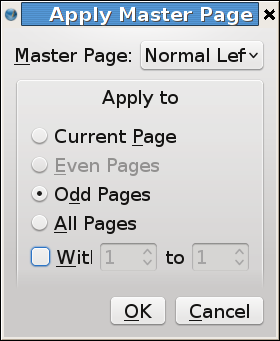
Scribus includes two tools for applying Master Pages. The first is Page -> Apply Master Page. When the dialog window opens, you have the choice of selecting a specific master page and applying it to the current page, even, odd, or all pages, and to a range of pages within that selection.
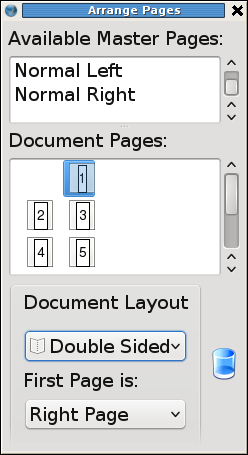
Alternatively, you may prefer to select Windows -> Arrange Pages. This dialog is really a map of the entire document. From it, you can select a page, then the master page to assign to it, or drag the page to the trash can. In addition, you can select the document template, and select the Master Page to use for the first page -- a useful feature, given that the first page of a document may have objects like a drop capital that others lack, and a much wide top margin than the other pages.
Saving as a Template
Designing has a fascination all its own, but you don't always have the time or the inclination to recreate standard types of documents over and over, especially on a longer document. You can save yourself untold time if, each time you create a document with different Master Page styles, you finish by selecting File -> Save as Template.
That way, after you design a few documents, you will have templates for your most common document types, and almost never need to worry about Master Pages again. At the very least, you may be able to import a Master Page from another document to repurpose it.
Learn your way around Master Pages, and you will never regret the effort. The only feature that might save you more time is Scribus' implementation of styles.


