OOo Off the Wall: Recovering Hidden Treasures
It's a little-known secret, but what you see in the interface of version 2.0 of OpenOffice.org isn't what you have to settle for. Hidden throughout version 2.0 are dozens of pieces of functionality, each available in a few seconds by customizing the menus, toolbars or keyboard shortcuts of OpenOffice.org applications. Some of these hidden treasures are small tools useful only to users with certain work habits. However, perhaps the most useful customizations are older versions of tools that have been redesigned in version 2.0. In several cases, these older versions are designed better than their replacements. And, if nothing else, they often are more familiar.
These former version of tools can be recovered for use by customizing commands in menus, toolbars and keyboard shortcuts. Menus and keyboards use a similarly designed windows for customization, while toolbars, for some reason, cram the same functionality into one window. In either interface, customization is easy enough once you've gone through it the first time.
For the sake of simplicity, let's focus on adding commands to menus:
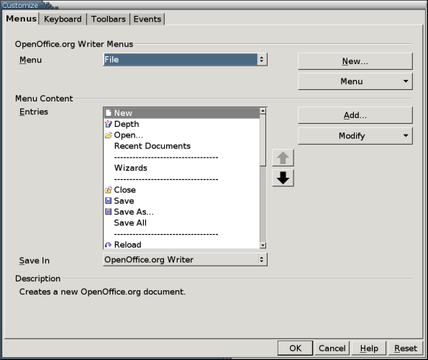
1. Select Tools -> Customize. The Customize window opens.
2. Do one of the following: select an existing menu to which you can add an icon from the Menu drop-down list, or create a new menu using the New button. OOo already has nine menus, which is about the limit of what is convenient. For this reason, think twice before creating a new menu. You also can move the position of menus if you select the Move menu.
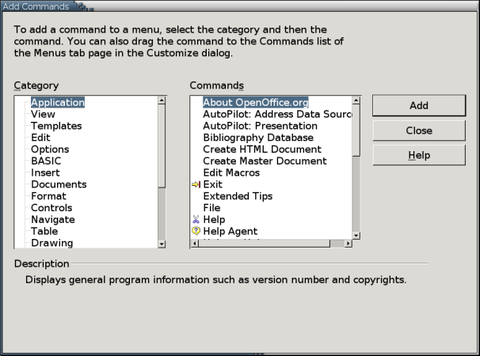
3. Select the Add button. The Add Command window opens.
4. Select one of the Categories from the left-hand pane. The contents of the Command pane on the right changes with your selection.
5. Select a command from the right-hand pane. In most cases but not all, a description displays at the bottom of the window.
6. Select the Add button to add the command to the menu.
Nothing in the window indicates that you have made a choice. However, if you try to add the command a second time, the program bars the action and displays a message box explaining that the command is already in the menu.
7. Select the Close button when you are finished adding commands. You then return to the Customize window. The commands you have added now are listed in the Entries pane for the menu.
8. Use the Up and Down arrows to position commands. You also can select the Modify button to add a new sub-menu, add a divider to group commands, rename a command or delete one.
9. Select the OK button to continue. You now have changed the menu for the current application only. Remember, if you want a feature to be available in another application, you have to repeat the process in the second application.
Because customization affects the program, not your documents, you don't need to save anything in a template.
Which commands you consider treasures depend partly on your work habits. For example, if you want more control over deletion, the Edit category has a dozen commands to delete either the start or end of words, lines, sentences or paragraphs. You can enable a similar range of commands for selection in the Navigate category. Similarly, frequent macro writers might want to enable some of the commands in the OpenOffice.org category.
One of the most common customizations may be to enable functionality available in one application that you frequently need in another. For example, although 3-D objects are available in Draw, they aren't available in Writer.
By far, though, the most useful customizations are ones that were available in the editing window in earlier versions but were removed from the 2.0 default interface. These customizations include:
View -> Graphics On/Off. This option presumably was removed from version 2.0's interface because of the panic it causes in newcomers who accidentally activate it. Still, if you're creating a Writer document full of graphics--especially on a low-memory machine--toggling this command is a useful way of speeding up scrolling.
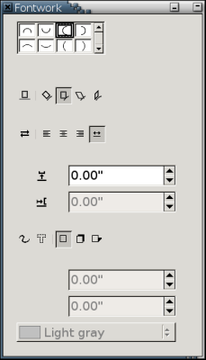
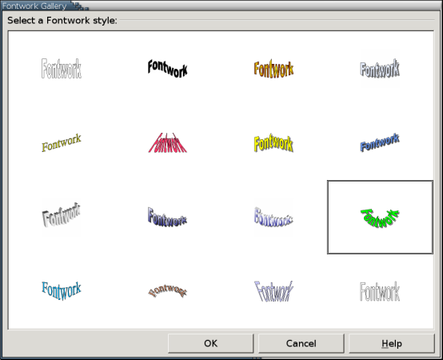
Format -> Fontwork. This is the tool that bends graphical text into fantastic shapes. In order to make the interface more like MS Office, version 2.0 replaces Fontwork with the Fontwork Gallery and a Fontwork floating toolbar. Because you have to choose a sample from the Fontwork Gallery, regardless of whether there's one whose color and shape suits your needs, the changes are a step backward in usability. Nor, as far as I can see, can you adjust or tweak the text's shadow with the new tools. The old Fontwork tool is much quicker to use and provides more options.
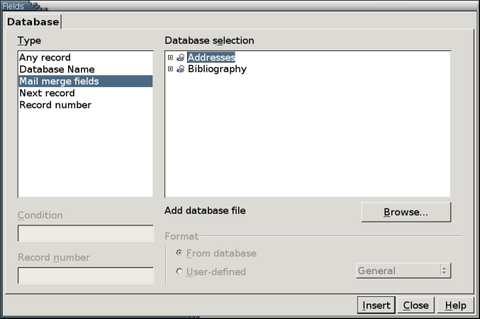
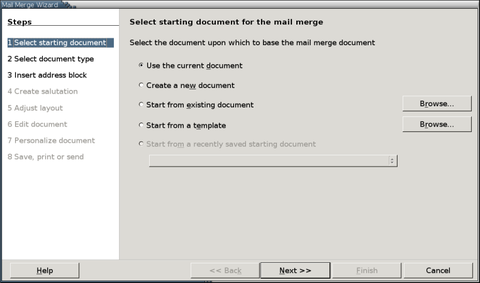
Documents -> Mail Merge. Version 2.0 replaces this with the Mail Merge Wizard. This tool may be fine if you want to mail merge a letter or have a JavaMail client to merge to e-mail. However, it's a change for the worse if you use mail merge for any other purposes, such as outputting two slightly different versions of the same document. It's also a problem if you're a free software advocate who would prefer to avoid using Java. Moreover, wizard or not, the new tool actually seems to be harder to use than the old one. You can retrieve the old tool from the Document category.
Format -> Asian phonetic guide. Ruby-text is a small line of text that appears above the main one. In earlier versions of OpenOffice.org, Ruby-text was enabled when Asian languages were enabled from Tools -> Options -> Language Settings -> Language, so that it could be used as a pronunciation guide in Japanese and Chinese. It is equally useful at providing a crib sheet for any language. Yet, for some reason, enabling Asian languages no longer makes Ruby-text available. Instead, you need to find the Asian Phonetic Guide in the list of commands.
The reasons for hiding some functionality under Tools -> Customize is easy to imagine. In many cases, the commands were unlikely to be used by beginners, and seeing them only must have added to anxiety options. In some cases, because they changed the display, commands could unnerve users who accidentally activated them.
In other cases, the changes in version 2.0 seem to have been intended to make OpenOffice.org's editing window closer to MS Office's. This seems to be the case with the removal of the Main toolbar from the left side of the window and the conversion of the Draw toolbar into a clone of MS Word's. These changes, the rationale goes, makes switching to OpenOffice.org easier--which is fair enough, except when it confuses existing users or involves copying a poorly designed interface.
Whatever the circumstances, finding the advanced tools squirreled away can be a relief. Admittedly, each one that is retained like a binary code version of an appendix contributes in a small way to code bloat, so maybe they should not have been retained. Yet, if you do know about them, you may be glad that they're still available, especially if you're a long-time user who's grown accustomed to them.
Bruce Byfield is a course designer and instructor and a computer journalist who writes regularly for NewsForge and the Linux Journal Web site.


