Tiny Core Linux
Several projects exist that purport to be small, run-in-memory distributions. The most popular probably is Puppy Linux. Puppy has spawned several variations, and I have used it several times myself on older machines. But, I have discovered one that bowled me over completely—Tiny Core Linux. This distribution is a totally different beast and fills what I think is as of yet an unfilled category.
To start, Tiny Core is tiny—really tiny. The full desktop version weighs in at approximately 10MB—this is for a full graphical desktop. Not many other options can deliver something like this. People of a certain age may remember projects like Tom's root/boot, or muLinux. Tiny Core fits somewhere in between those older floppy-based projects and “heavier” small distributions like Puppy.
Along with this full version, there is an even more stripped-down version called Micro Core, which weighs in at less than 7MB. This version provides a command-line interface for all of you text aficionados. Tiny Core is designed to be run completely, or partially, from RAM. This means the system can be very fast and responsive. You also can set up the system so that it is loaded fresh on every boot, which reduces the probability of cruft working itself into your system dramatically.
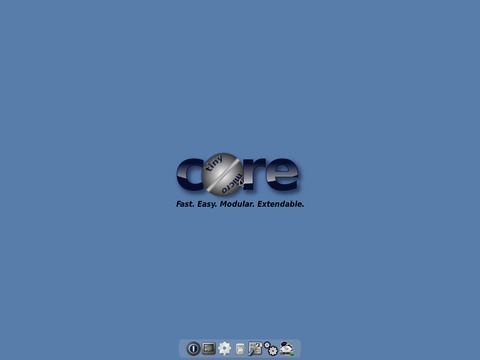
To get Tiny Core, download it as an ISO image, which can be burned to a CD or copied to a USB device. Basically, you can put it on anything bootable. When you boot it up, you get the full desktop in a matter of a few seconds—in a virtual machine on my Mac, it takes less than five seconds (Figure 1).
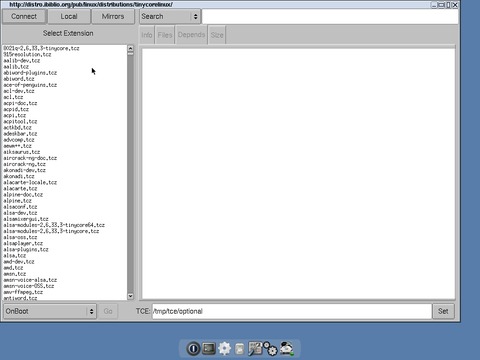
The default gives you a window manager (flwm, the Fast Light Window Manager), a set of custom tools and a terminal (aterm). Everything else is available as an installable package, using its own custom package system called the AppBrowser (Figure 2). At the time of this writing, 3,170 packages are available. Packages are being added constantly, and there are very clear instructions on how to create and add your own packages.
When you boot Tiny Core, you initially are dumped at a boot prompt (Figure 3). If you don't do anything, it times out and places you on the desktop. However, you can use boot codes, which have the form of tinycore option1 option2 .... Some of these boot codes include:
tce={hda1|sda1} — specify restore TCE apps directory.
waitusb=X — wait X seconds for slow USB devices.
swapfile{=hda1} — scan for or specify a swap partition.
base — skip TCE and load only the base system.
xsetup — prompt user for Xvesa setup.
text — start up in text mode.
{cron|syslog} — start various dæmons at boot time.
host=XXXX — set hostname to XXXX.
noautologin — skip automatic login.
desktop=xyz — use alternate window manager.
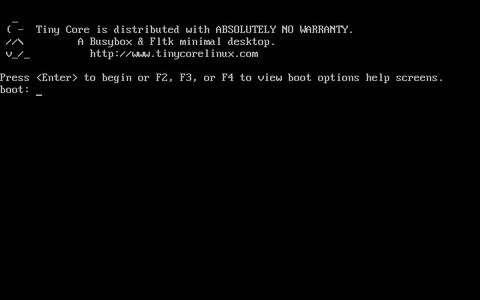
Figure 3. On bootup, you are greeted with a prompt where you can enter options to control your system setup.
Many other options are available. You can find them on the Tiny Core Wiki or list them during bootup. By default, you're logged in as user tc automatically and end up at the desktop with flwm as the window manager.
One of Tiny Core's features is that you get a fresh system on every boot. But, what if you want to save settings over a reboot? What are your options? In Tiny Core, you have the option to back up any necessary files at shutdown and have them be recovered automatically on boot. These files are saved to the file mydata.tgz. By default, the system saves all the files and directories that exist under /home/tc.
You can control what's actually backed up and what's ignored by using the files /opt/.filetool.lst and /opt/.xfiletool.lst. In .filetool.lst, you can add any files you want included in the backup. The file .xfiletool.lst contains a list of files to exclude from the backup. This backed-up home directory resides in RAM, so if you have a lot of files in your home directory, they will take up precious RAM. Also, as your home directory gets bigger and bigger, the startup and shutdown times grow as those files are being backed up and restored.
Another option is to create a persistent home directory. You can tell Tiny Core where to find this with the boot code home=xxx, where xxx is the device partition storing your home directory (for example, sda1 for the first partition on the first drive). If you want to put the home directory inside a subdirectory, you can hand this in with:
home=xxx/yyy
where yyy is the subdirectory name.
This gives you a really fast basic desktop, which is fine for everyday use. But, what if you want to adjust the distribution for some special case? To figure out how you can personalize it, let's take a step back and look at how Tiny Core is put together and how it works. Then you'll see how to change the system to suit your application.
The core part of the system is stored in a compressed filesystem that gets copied to RAM. Any extra applications are mounted from wherever they are stored as loopback devices, by default. They can be selected to be actually copied to RAM along with the core system, if you prefer. The advantage of this “run from RAM” system is that once the system has finished booting, you can remove the storage media.
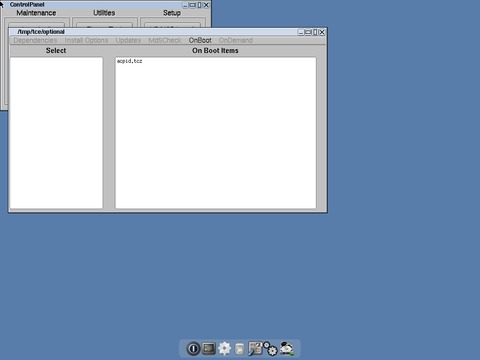
In the first case, let's assume you have the system booting from a USB device that you don't need to remove. Then, you have two options on how to set up the system. The first, mount mode, is to create a directory called tce on the USB device. In this directory, you can dump packages for all the applications you want to have available. These then are mounted as loopback devices. You can use a utility called appsaudit to maintain those packages. You have the choice of having those packages mounted at boot time, or you can have them mounted “on demand” (Figure 4). The other option is called copy mode. In copy mode, Tiny Core actually takes the contents of the package files and copies them all into RAM. This costs a bit more in boot time, but then the entire system is, again, running from RAM, so you get the expected speed-up once everything boots. You actually can control which packages are copied into RAM on an individual basis through the configuration file copy2fs.lst. The system can use this file to decide what is copied and what is mounted.
These aren't the only methods available if you want to make a tailored distribution. Because Tiny Core is under the GPL, you can grab the source code and mess around as much as you please. You actually can just remaster the ISO to add in any extra packages you need for your application. In the ISO, there is a gzipped cpio archive named tinycore.gz. This file contains the core filesystem that is mounted in RAM when Tiny Core boots. You can do this work on any Linux box or even from within Tiny Core. If you want to do it in Tiny Core, you need to install a few extra packages before you start: advcomp.tcz and mkisofs-tools.tcz. Once you have all the tools you'll need, you can mount the ISO image:
sudo mount tinycore.iso /mnt -o loop,ro
where /mnt is the directory to which you want to mount. You also need a directory into which you can extract the Tiny Core filesystem, which for this piece, let's call it /temp/extract. To get the files, you need to execute the following:
cp -a /mnt/boot /temp
cd /temp/extract
zcat /temp/boot/tinycore.gz | sudo cpio -i -H newc -d
Once this command is done, you can go ahead and change files, add new ones or delete others. This way, you can add extra binaries (such as for a point-of-sale application) directly as part of the system. If you want to be able to handle special hardware, where you'll need a new kernel module, you can add it to the filesystem. But, then you'll need to run this:
sudo depmod -b /temp/extract 2.6.29.1-tinycore
You also may need to add new shared libraries to provide support for any new binaries you install. If you do, run this:
sudo ldconfig -r /temp/extract
Once you've finished creating a personalized filesystem for Tiny Core, you need to get it ready to use. The first step is to pack the filesystem back up into a gzipped cpio archive. Run the commands:
cd /temp/extract find | sudo cpio -o -H newc |
 ↪gzip -2 > /temp/tinycore.gz
cd ..  advdef -z4 tinycore.gz
This will give you a brand-spanking-new core file. If you are using a system other than a CD from which to boot (like some form of hard drive), you simply need to copy tinycore.gz and the kernel to that device.
If you want to create a new ISO image that you can use over and over again, execute the following commands:
cd /temp
mv tinycore.gz boot
mkdir newiso
mv boot newiso
mkisofs -l -J -R -V TC-custom -no-emul-boot \
   -boot-load-size 4 -boot-info-table \
   -b boot/isolinux/isolinux.bin \
   -c boot/isolinux/boot.cat -o TC-remastered.iso newiso
rm -rf newiso
You now have a nice new ISO that you can put to work.
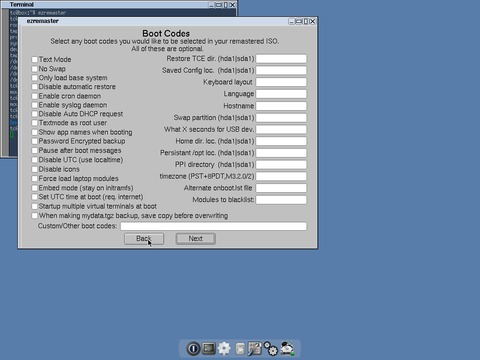
This kind of task happens often enough that the Tiny Core team has put together a GUI application that helps simplify these steps called ezremaster. Install it using the AppBrowser. This way, all the required dependencies also will be installed. You also need either to have the ISO available or a CD mounted. Once you've done all of these steps, open up a terminal and run ezremaster from the command line, and you should see what's shown in Figure 5. Here you can point it to the locations it needs, and you should end up with what's shown in Figure 6. From there, you can set all kinds of options to customize your ISO image. The sections available are:
Boot codes.
Display settings and mydata.tgz backup.
Security settings and users.
Which services would you like enabled?
Network settings.
Window manager, core elements and Xorg settings.
ISOLINUX settings and 64-bit kernel.
Startup and shutdown scripts.
Extension installation.
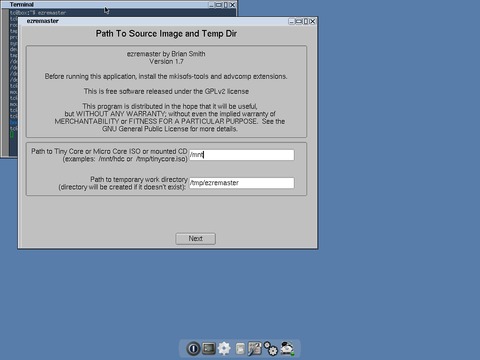
Figure 5. The first step when using ezremaster is setting paths for the source files and a working directory.
Once you have finished all of these steps, move on to “Remaster step #1”, where the filesystem for the new ISO is created. Once that step is done, move on to the last step, “Remaster step #2”, where the actual ISO image is created. It ends up in the temporary directory you defined in the first screen. Now you're ready to deploy your awesome customized Linux on the world.
Be sure to check out the Tiny Core Web site and Wiki for more information (www.tinycorelinux.com). There is also a very active forum at the main site where people always are happy to answer questions. Hopefully, this project can give you a quick start for generating your own custom distributions for your smaller projects.
When Joey Bernard isn't debugging scientific code or sorting out problems on the clusters at the university, he's working on refinishing furniture or playing with his boys in the backyard. He might call himself a renaissance man, but that sounds a little too presumptuous. Just call him a well-rounded geek.




346f.png?itok=6_Cm3g2s)

